Hi friend!
We wanted to share some basic tips for building a C2C Bobbin Stand.
Supplies:
8 – ¾” non-threaded PVC caps
6 – ¾” non-threaded T Joints
4 – 3/4” non-threaded 90-degree elbow
3 – 5’ pieces of ¾” PVC pipe
2 – ½” non-threaded PVC caps
1 – 5’ piece of ½” PVC pipe
Cut the following pieces in this order:
Using the ¾”PVC pipe: 1 – 3 foot piece – the support bar (C in picture 1)
2 – 2 ½ foot pieces – sides, cut 1 of the 5’ pieces in half (B in picture 1)
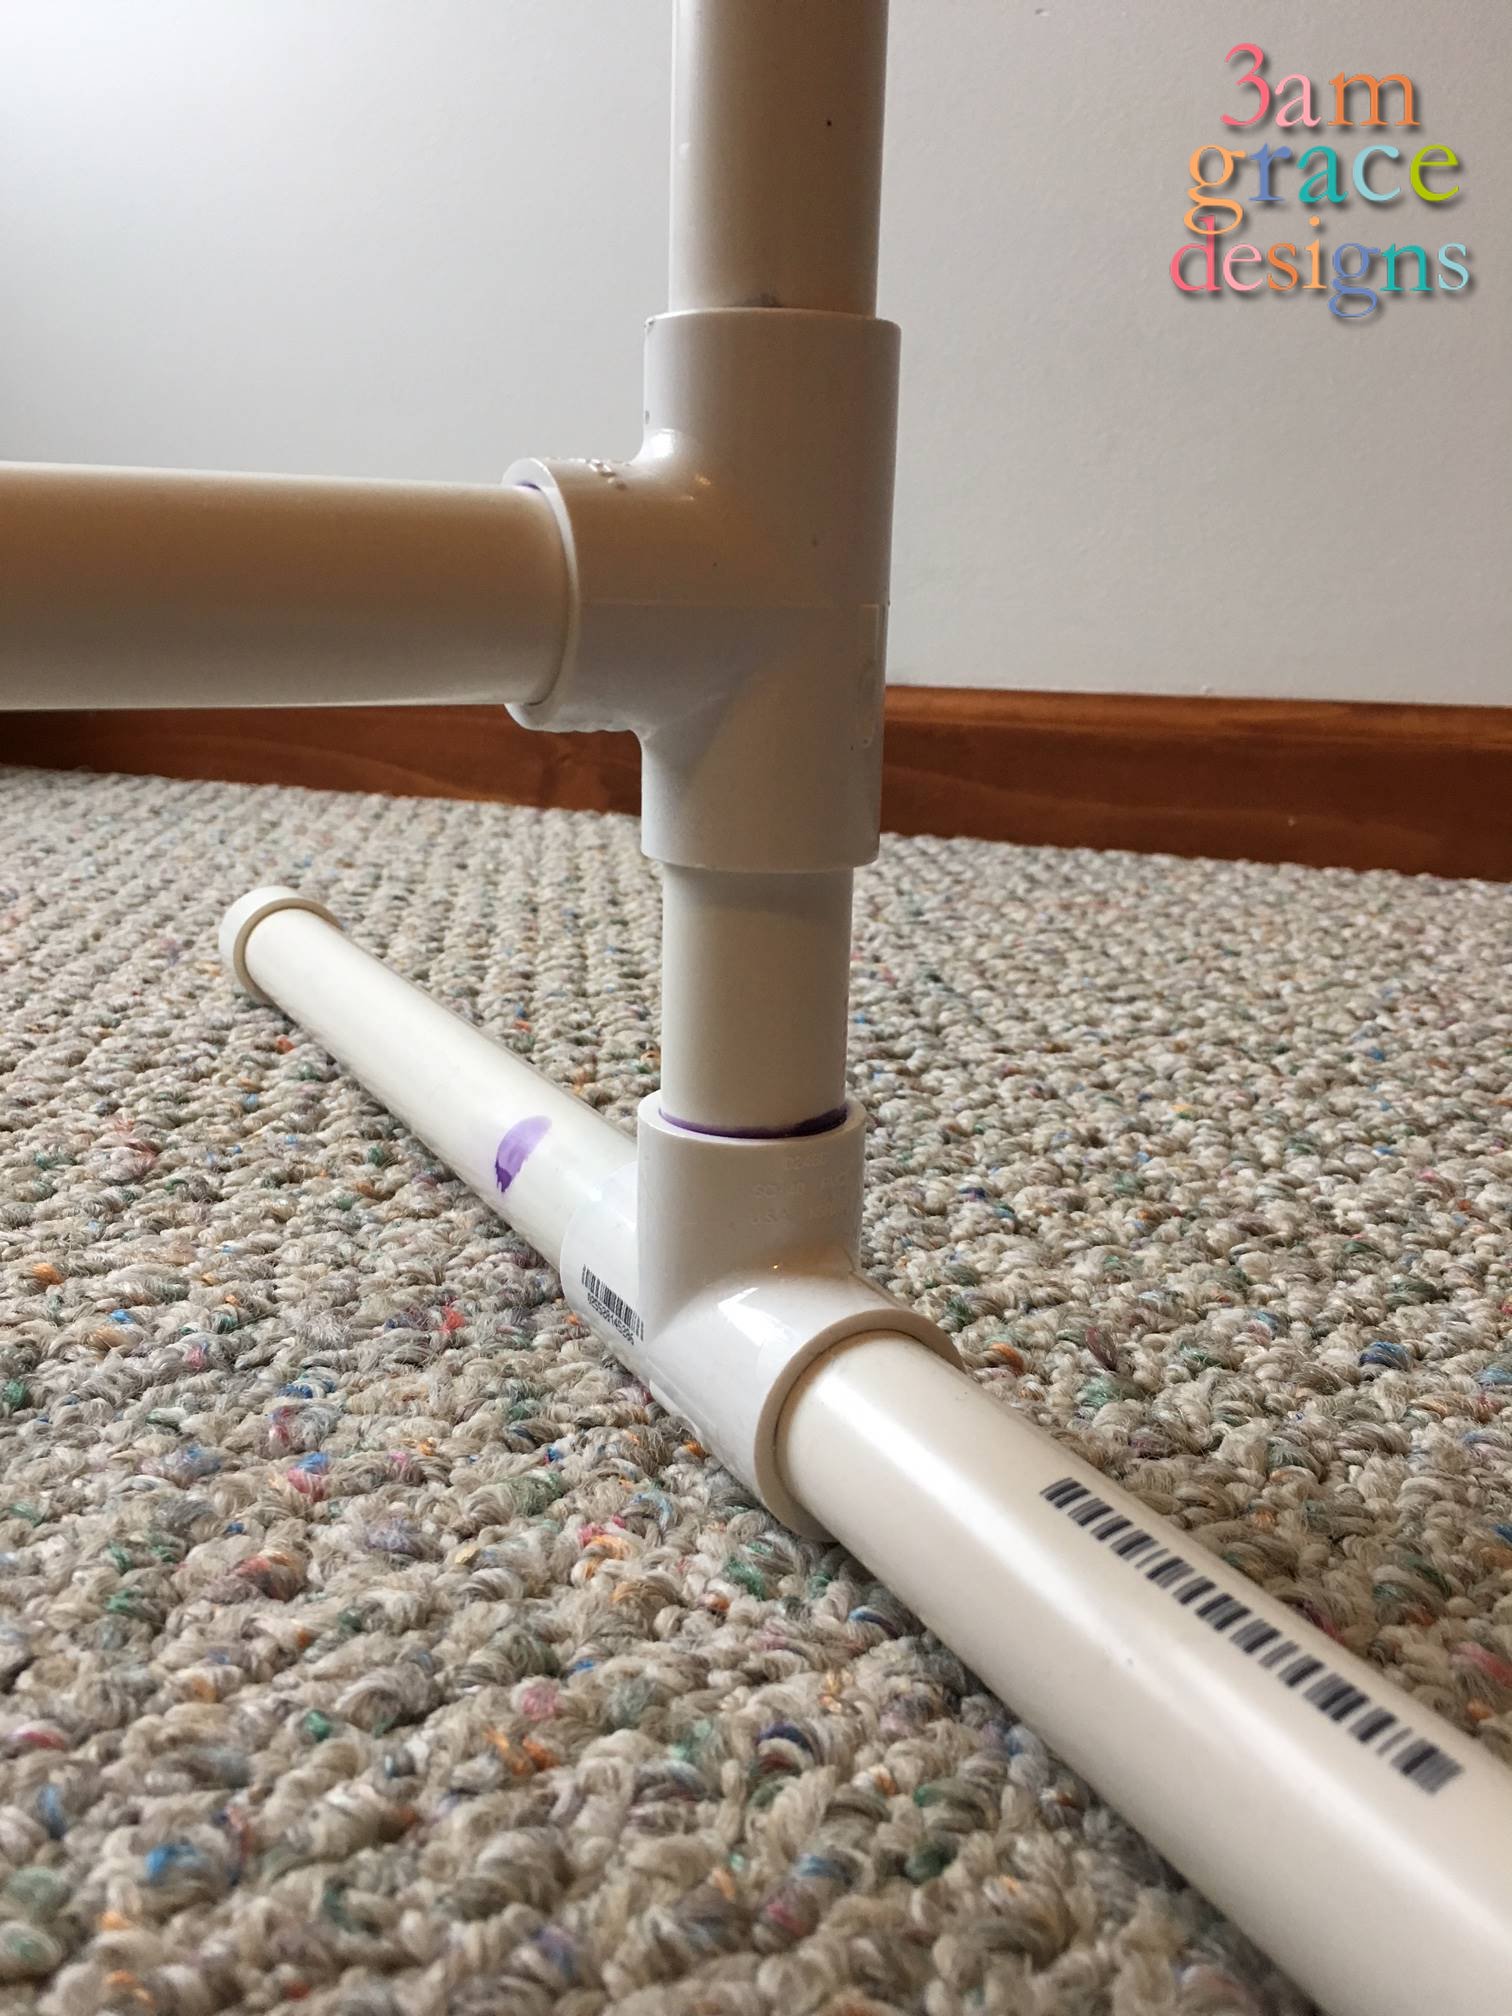
4 – 1 foot pieces – the feet (D in picture 1)
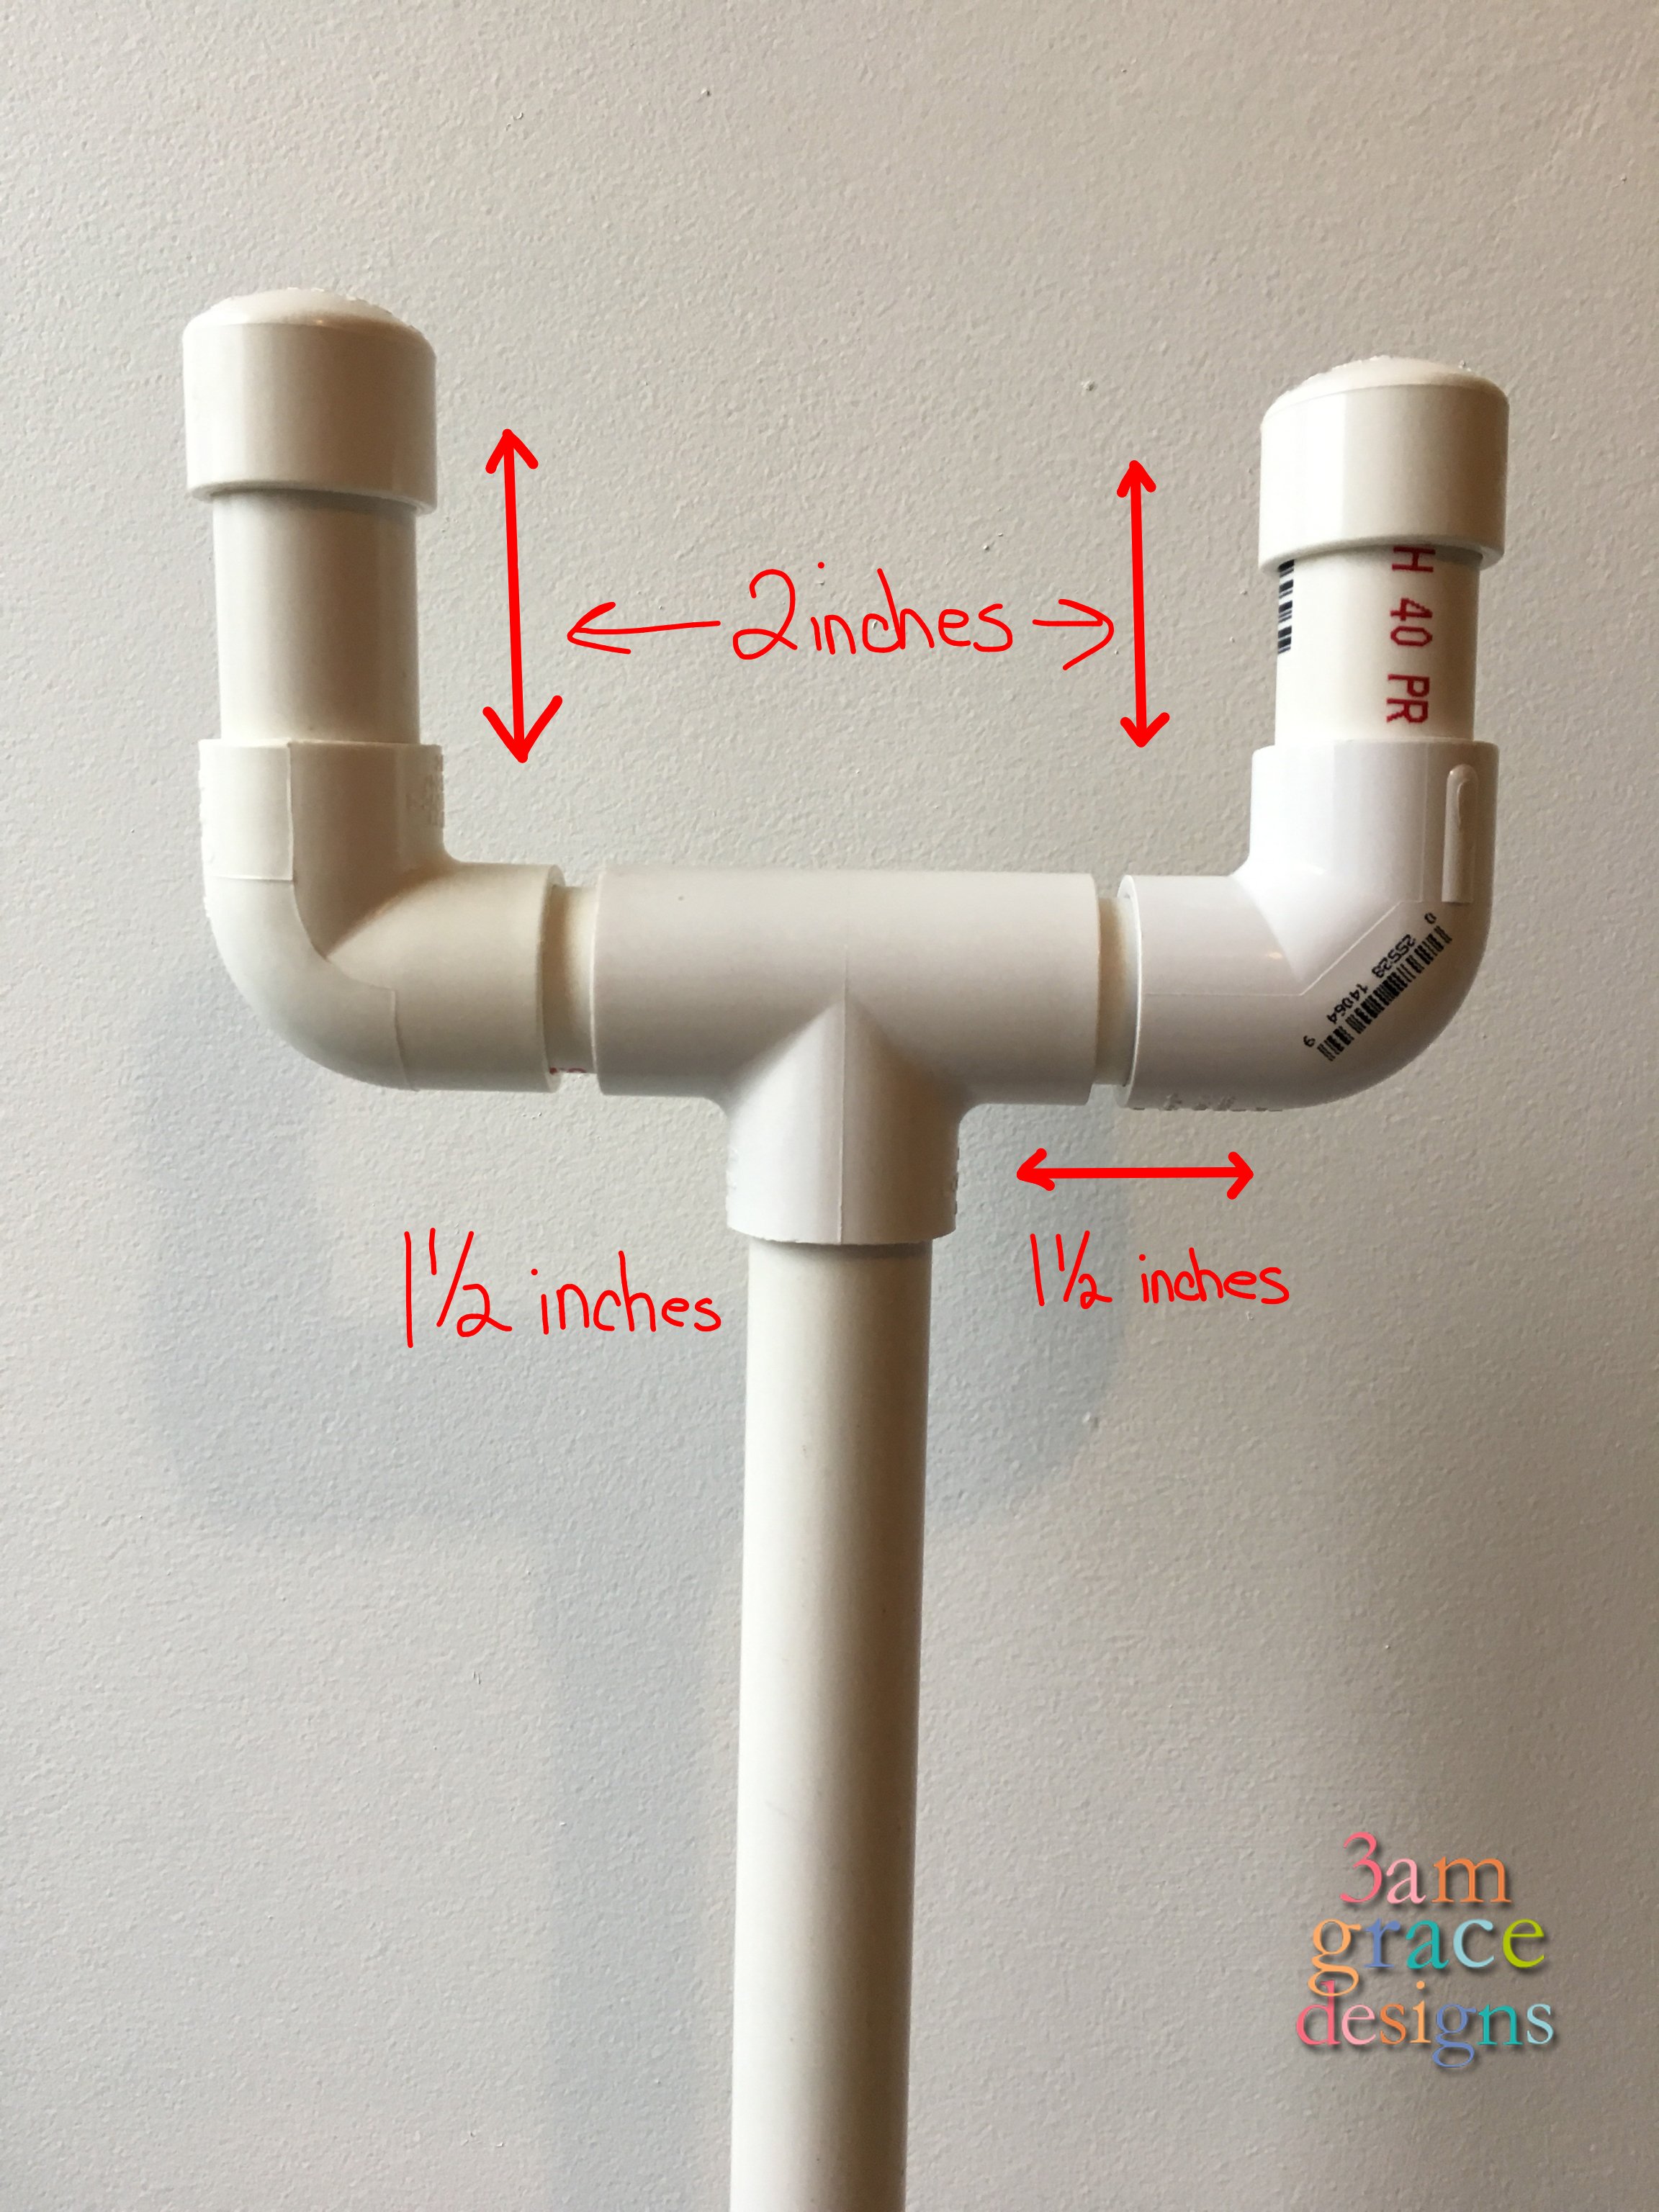
4 – 1 ½ inch pieces (See picture 2) 4 – 2 inch pieces (See picture 2)
Using the ½” PVC pipe: 1 – 3 ½ foot piece – bobbin clip bar (A in picture 1)
Michaelene’s stand was designed so she could use it while sitting in her recliner, which is why her support bar is close to the bottom (see C in picture below). You can put your support bar wherever you like. The two 2 1/2’ pieces that you cut are for the sides. Make a cut wherever you want your support bar to be and then connect the cut pieces with the T joint.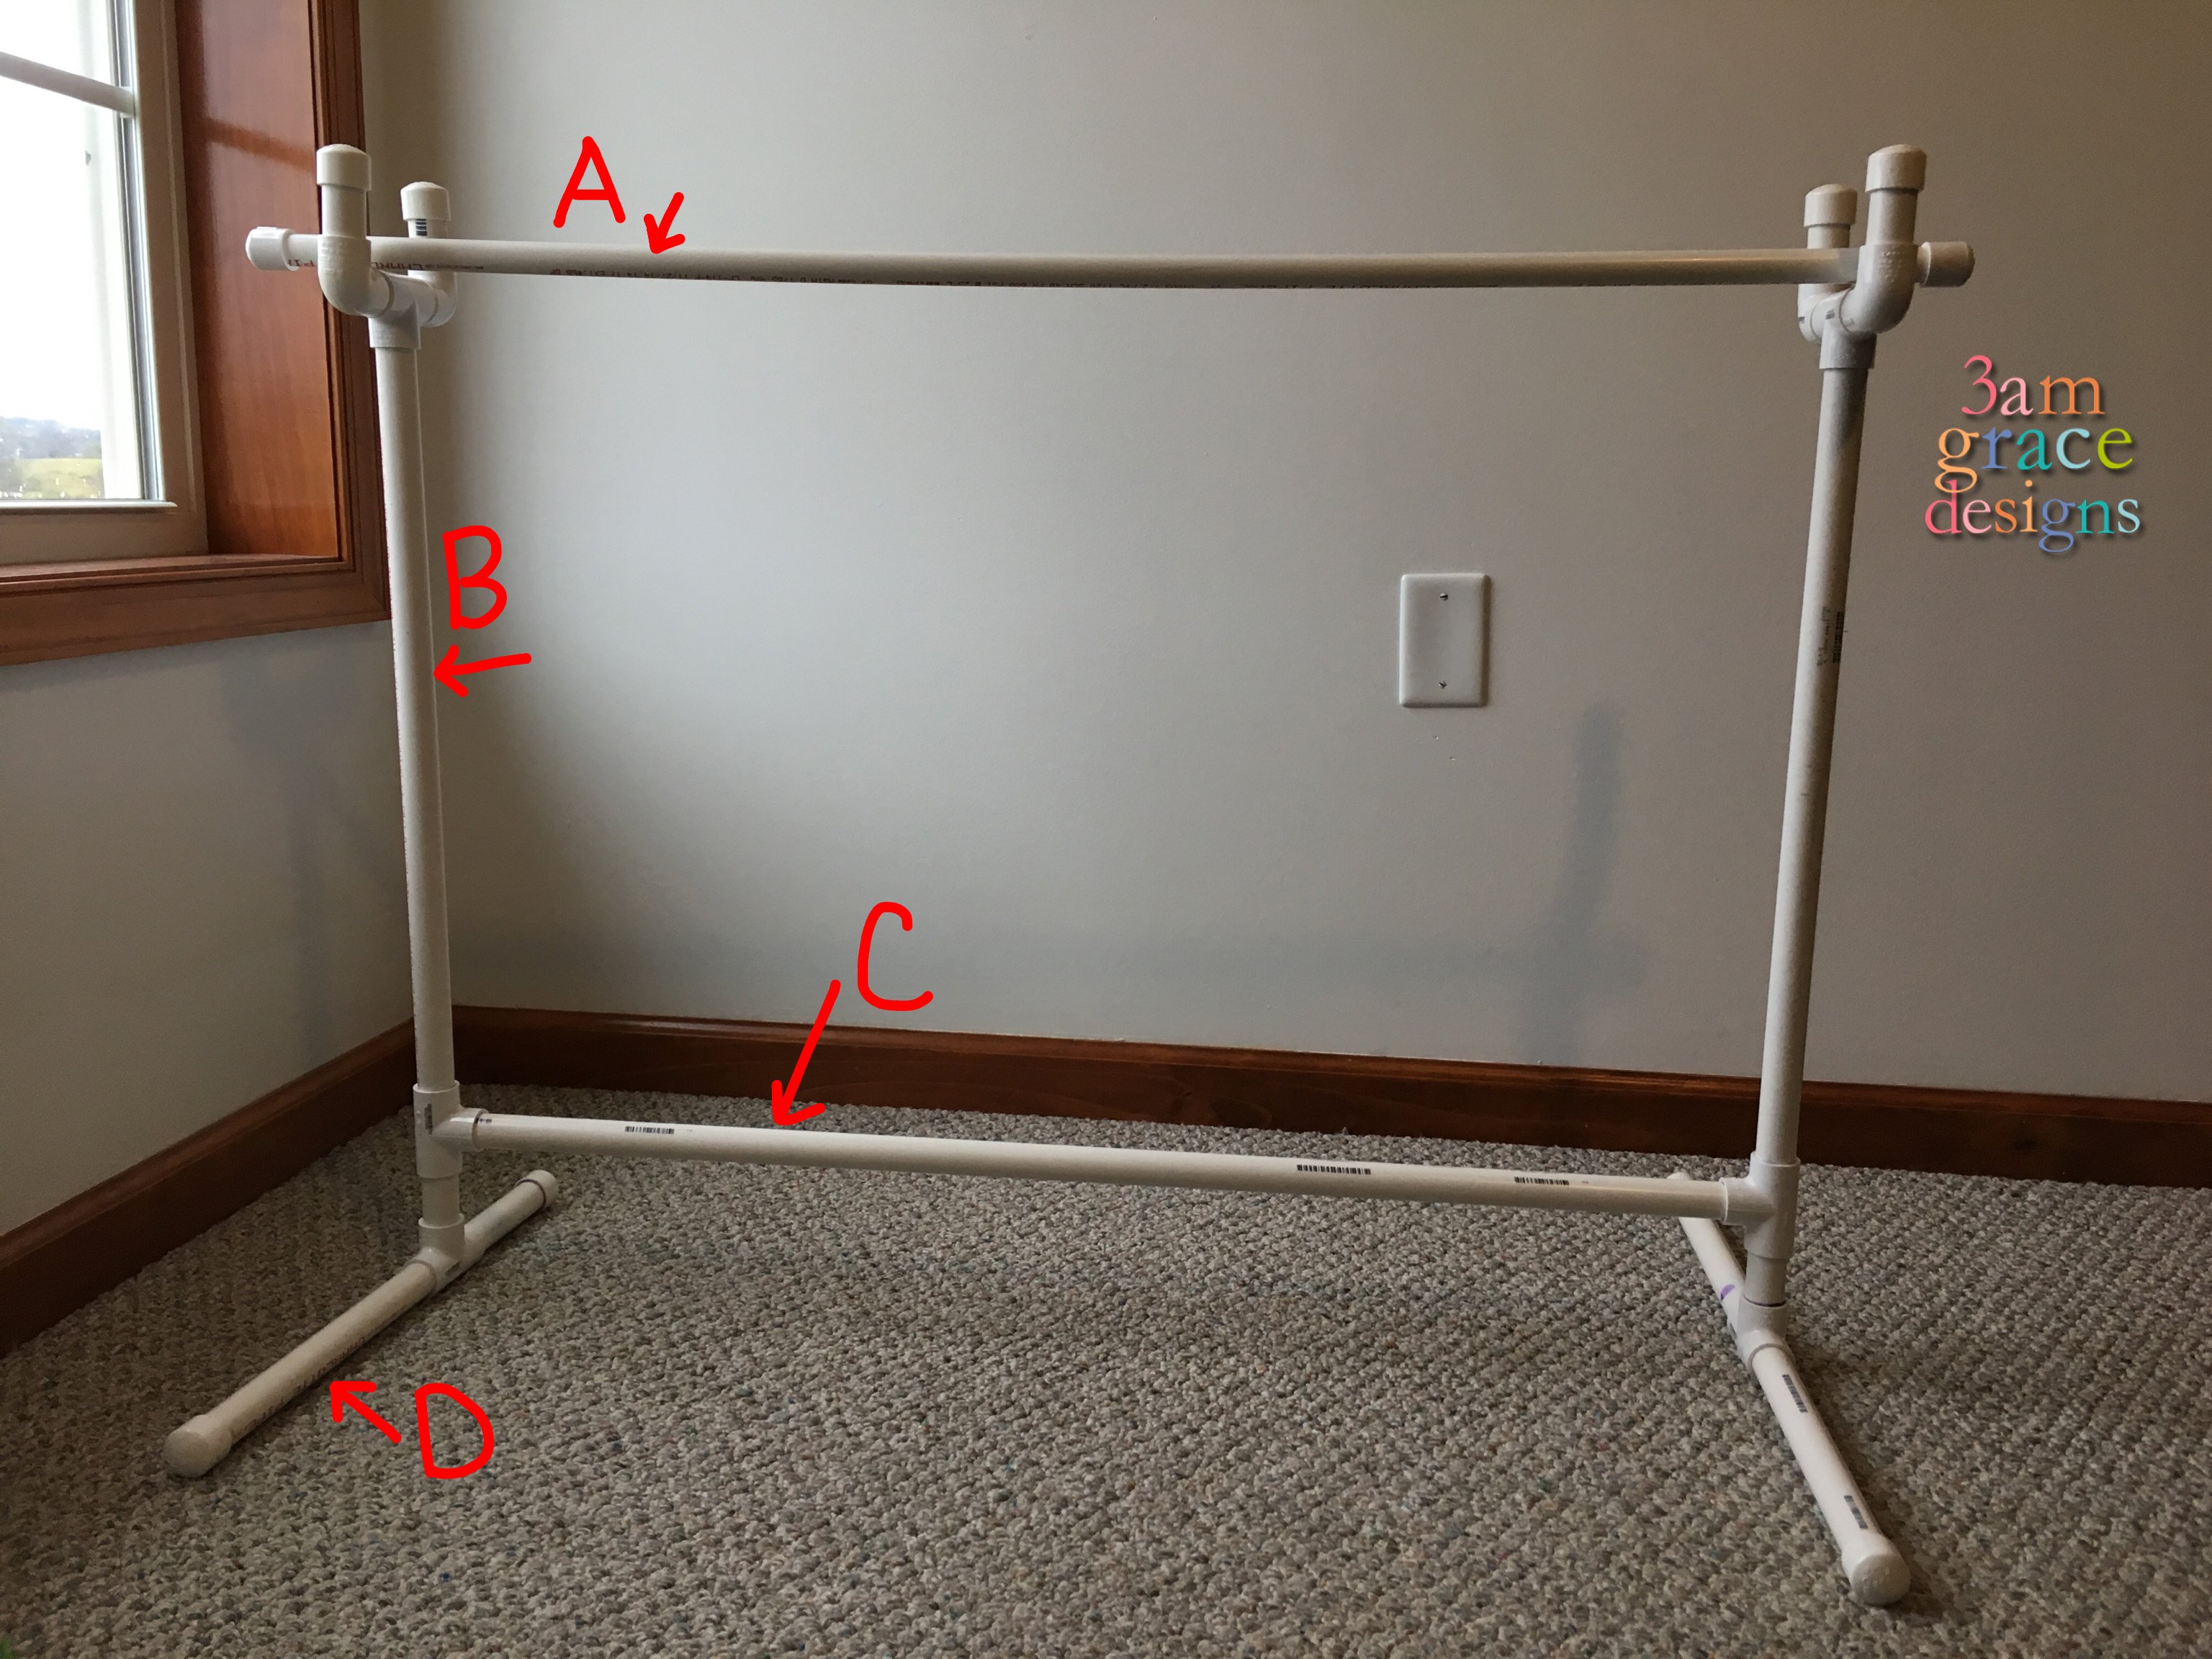
Use the ½” PVC pipe for your bobbin bar. Your bobbin clip bar (see A in picture above) needs to be wider than your stand so it doesn’t fall. Putting the caps on the end help so the bar does not slide off.
You can customize the size of your stand however you would like, this is just how Michaelene’s was designed.
Since Michaelene’s husband works with PVC occasionally, he used PVC primer and cement to glue all the pieces together. If you do end up using PVC cement, please remember that the bond is instant so make sure you have your pieces lined up correctly. We suggest that you do not use the cement if you want to be able to disassemble your stand. Another option is to hammer your pieces together when you are assembling your stand.
In the video below Michaelene gives an overview of her stand and explains her design choice. While you’re there, subscribe to our YouTube channel to view all our How-To videos!
Happy Crocheting!

Really cool. Thankyou!!
You’re very welcome!
I really like this idea, but what if the amount of yarn needed for a bobbin won’t fit on the dollar tree clip and still function as a clip? Do you have any suggestions or tips for still using the bobbin stand in that scenario? Thanks
Hi Kirsten! When we load our clips, we just add the amount of yarn that will fit nicely. Then we reload if needed.
Thank you so much for this! I am short, and my recliner is close to the floor. Hubby built this like yours, but then we made a few tweaks. We flipped the side bars to move the support bar to the top, and added a T on each leg, and put a second bar between them. (two extra T connector, one extra 3 foot bar) This made it more stable, as we decided not to glue. It also allows me to raise my recliner easier, as the bar is on the floor. He also put a two inch piece of pipe on the top for the bar to rest in, so it would not move as much, and used nipples at the front, so I could easily remove the covers for hooks and scissors.
So glad you were able to make one perfect for your set up! Happy Crocheting!
This is an awesome idea. I use the smaller dollar tree chip clips, but I think I will change over to these. I am going to ask my son if he can do a few tweeks on this, but it is great. Thank you