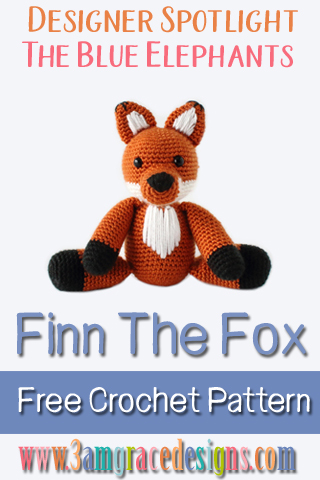
How To Crochet An Amigurumi Fox With Shehla From The Blue Elephants. This Amigurumi Makes An Adorable Gift For Your Favorite Fox Enthusiast!
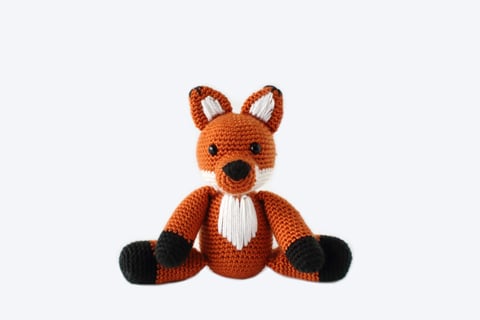
We’re thrilled to share this week’s Designer Spotlight crochet designer with you! Shehla from The Blue Elephants has created Finn The Fox for you!
Shehla started knitting and crocheting in high school with the help of tutorials on Youtube. Since then, she’s created The Blue Elephants blog to share her designs, new projects, and help others. You’ll learn how to crochet, knit, and get access to patterns that are fun and modern – but more than that, you’ll be part of a community of makers. A community of strong women who make things happen and empower each other to grow and share their unique gifts. Her goal is to guide and teach you how to take your passions and create a business with them, find joy in doing what you love no matter what others think, and to reach for the things you want in life.
Be sure to go support Shehla on her social media and thank her for sharing her beautiful pattern in our Designer Spotlight feature!
Blog
Pinterest
Ravelry
Etsy
Instagram
Facebook

CLICK HERE for the ad-free, printable PDF pattern on Etsy
CLICK HERE for the ad-free, printable PDF pattern on Ravelry
Hey, friends! I’m Shehla from The Blue Elephants and I love to share crochet patterns, tutorials, and all about running a handmade business. Over on my blog, one of my favorite things to create are toys. Plushies, amigurumi, dolls – whatever you choose to call them, these toys are soft and cuddly and it’s so much fun to create all the different critters! Today, I’ll be sharing the pattern for Finn the Fox, so let’s get right into it!
Materials:
- 3.25mm crochet hook
- #4 worsted weight yarn – I used I Love This Yarn in Pumpkin Spice, Black and White
- polyfill stuffing
- 10mm safety eyes
- tapestry needle
Abbreviations:
- ch – chain
- SC – single crochet
- Inc – increase
- Dec – decrease
- BO – bind off
- sl – slip stitch
Pattern Notes:
- Skill level: Beginner
- Sizing: 9.5 inches tall
- Gauge: 6S x 5R per inch
Head
Round 1: With your orange yarn, create a magic loop and work 6 SC into in. Pull the loop closed and use a stitch marker to mark the first space. You’ll be working in continuous rounds for the entire pattern.
Round 2: Inc in each space by working 2 SC into each (12).
Round 3: *SC, inc* around (18).
Round 4: *SC 2, inc* around (24).
Round 5: *SC 3, inc* around (30).
Round 6: *SC 4, inc* around (36).
Round 7: *SC 5, inc* around (42).
Round 8: *SC 6, inc* around (48).
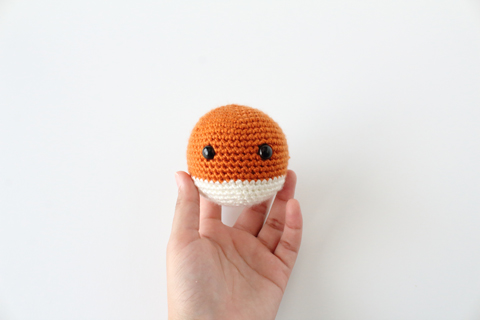
Rounds 9-16: SC around for 8 rounds. Switch to the white yarn.
Rounds 17-18: SC around for 2 rounds.
Round 19: *SC 6, dec* around (42).
Round 20: *SC 5, dec* around (36).
Round 21: *SC 4, dec* around (30).
Round 22: *SC 3, dec* around (24). Insert the eyes on the 5th round of orange after the last increase and about 5 stitches apart. You can play around with the placement, but once you’re happy with it, secure the backings. Start to add in the stuffing now.
Round 23: *SC 2, dec* around (18). Finish adding stuffing.
Round 24: *SC, dec* around (12).
Round 25: Decrease around (6). Bind off and thread the tail yarn through a tapestry needle. Bring the needle under the front loops only of the 6 stitches left and pull to close. Secure the yarn and trim the yarn.
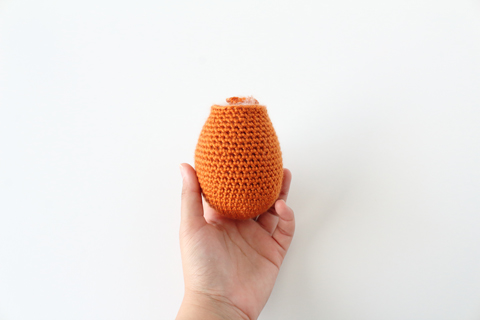
Body
Round 1: With your orange yarn, create a magic loop and work 6 SC into in. Pull the loop closed and use a stitch marker to mark the first space.
Round 2: Inc in each space by working 2 SC into each (12).
Round 3: *SC, inc* around (18).
Round 4: *SC 2, inc* around (24).
Round 5: *SC 3, inc* around (30).
Round 6: *SC 4, inc* around (36).
Round 7: *SC 5, inc* around (42).
Rounds 8-17: SC around for 10 rounds.
Round 18: *SC 5, dec* around (36).
Rounds 19-20: SC around for 2 rounds.
Round 21: *SC 4, dec* around (30).
Rounds 22-23: SC around for 2 rounds.
Round 24: *SC 3, dec* around (24).
Rounds 25-26: SC around for 2 rounds. Bind off and leaving a long tail for sewing.
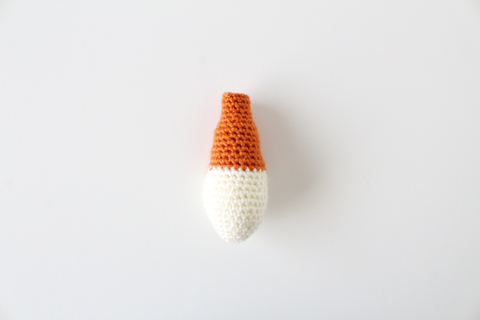
Tail
Round 1: With your white yarn, create a magic loop and work 6 SC into in. Pull the loop closed and use a stitch marker to mark the first space.
Round 2: Inc in each space by working 2 SC into each (12).
Round 3: SC around.
Round 4: *SC, inc* around (18).
Round 5: SC around.
Round 6: *SC 2, inc* around (24).
Round 7: SC around.
Round 8: *SC 3, inc* around (30).
Rounds 9-10: SC around for 2 rounds.
Round 11: *SC 3, dec* around (24).
Rounds 12-13: SC around for 2 rounds. Switch to orange.
Rounds 14-15: SC around for 2 rounds.
Round 16: *SC 2, dec* around (18).
Rounds 17-21: SC around for 5 rounds.
Round 22: *SC, dec* around (12).
Rounds 23-27: SC around for 5 rounds. Bind off and leave a long tail for sewing.
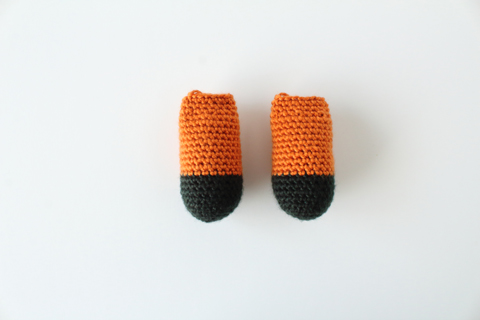
Legs (make 2)
Round 1: With your black yarn, create a magic loop and work 6 SC into in. Pull the loop closed and use a stitch marker to mark the first space.
Round 2: Inc in each space by working 2 SC into each (12).
Round 3: *SC, inc* around (18).
Round 4: *SC 2, inc* around (24).
Rounds 5-10: SC around for 5 rounds.
Rounds 11-20: Switch to orange and SC around for 10 rounds.
Round 21: *SC 2, dec* around (18).
Rounds 22-23: SC around for 2 rounds. BO and leave a tail for sewing.
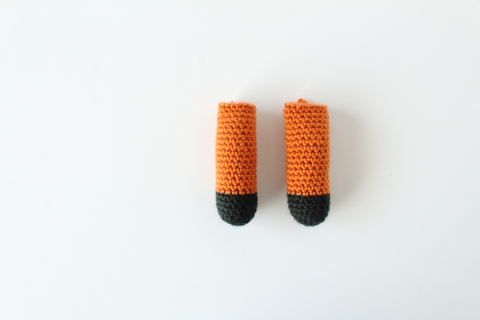
Arms (make 2)
Round 1: With your black yarn, create a magic loop and work 6 SC into in. Pull the loop closed and use a stitch marker to mark the first space.
Round 2: Inc in each space by working 2 SC into each (12).
Round 3: *SC, inc* around (18).
Rounds 4-7: SC around for 4 rounds.
Rounds 8-23: Switch to orange yarn and SC around for 16 rounds. Bind off and leave a long tail for sewing.
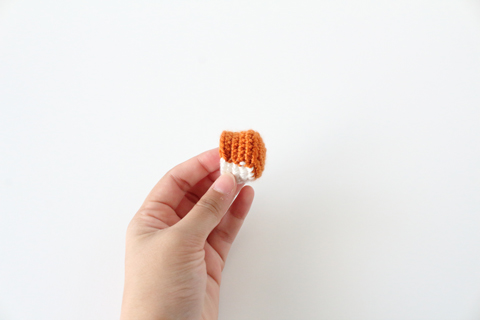
Snout
Round 1: Create a magic loop with orange and work 6 SC into in. Pull the loop closed and use a stitch marker to mark the first space.
Round 2: Inc in each space by working 2 SC into each (12).
Round 3: *SC, inc* around (18).
Round 4: *SC 2, inc* around (24).
Rounds 5-9: SC 12 in orange and 12 in white for the next 5 rounds. This tutorial can help you learn how to change colors seamlessly. Bind off and leave a long tail of each color for sewing.
Use some black yarn to embroider a triangle shape to the top of the snout as the nose.
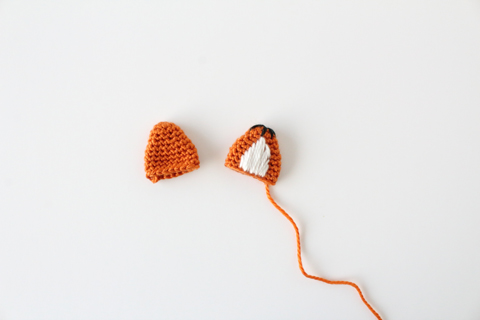
Ears (make 2)
Round 1: With orange yarn, create a magic loop and work 6 SC into it.
Round 2: Inc in each space by working 2 SC into each (12).
Rounds 3-4: SC around for 2 rounds.
Round 5: *SC, inc* around (18).
Rounds 6-10: SC around for 5 rounds. Bind off and leave a long tail.
Then use black and white yarn to embroider a few stitches to make the inside of the ears white and the tops black.
Assembling
With all the pieces of your crochet fox done, it’s just a matter of assembling everything. First, add some stuffing to all the parts, except the ears. Then align the snout to the head, using the color changes as a guide and use the orange tail to seam the orange part of the snout to the head and the white to attach the white part.
Next, fold the ears flat and use the tail end of the yarn and a tapestry needle to sew them in place at the top of the head. Next, use white yarn to embroider a few long stitches on the front of the body as the patch of white fur on the neck and belly. Hide the tails inside the body.
With the head done, position it onto the body and use the tail yarn from the body to seam around the base of the head. Work through each space on the body and the corresponding space on the head so it doesn’t wobble.
Next, line up the arms and legs where you want them and sew them into place as well. Finally, seam the tail to the back of the body and you’re done! Weave in any loose ends and trim the excess yarn to finish it off.
And you’re done!
I love how Finn the Fox turned out and I hope you do too! He’s absolutely perfect for Fall (I mean, the color is called Pumpkin Spice!) and although there is some embroidery, it’s simple to do. This is a great beginner’s project, so if you’re new to amigurumi, give it a try! You can also see my other plushies and toy patterns over on my blog here.
Thanks so much for having me!
Do you really use a 25mm hook or is this a typo?
Thanks Michele! It’s 3.25. 🙂
Do you join into the first St with a slip and then chain 1 for each round. Or would the join be done by making the first stitch on the next round go into the first St of the previous round? Sorry still a newby here. 😊
Hi Bev!
Here is the answer from the Designer:
It’s worked in continuous rounds so just stitch on top of the one from the previous round. You can use a stitch marker to keep track of where that stitch is.