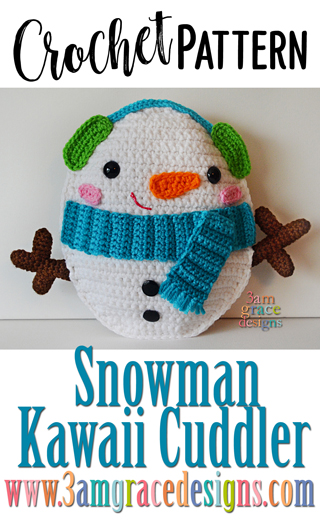
How To Crochet A Snowman Amigurumi Cuddler Pillow With Rosy Cheeks And Kawaii Smile. Our Snowman Crochet Pattern Works Up Quickly!
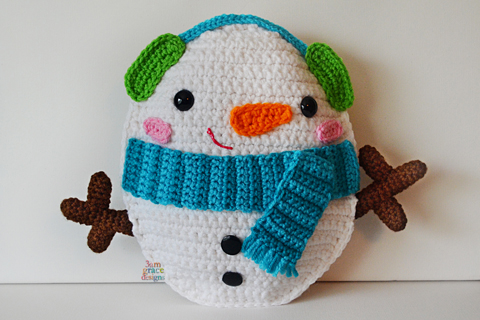
Hi friend! We are excited to share our Snowman crochet pattern Kawaii Cuddler® with you!
Here are some fun facts we found about the Snowman while researching our pattern:
- The World’s Smallest Snowman was just 0.01mm Tall.
- Japan holds the World Record for the Most Snowmen Built-in One Hour.
- According to the engineering journal Industrial Engineer, a “perfect” snowman is best attempted when snow is around 30 degrees to provide for ideal moisture content.
Our Snowman crochet pattern is happy to join our other Winter friend’s Snow Globe Crochet Pattern Kawaii Cuddler®, Yeti Crochet Pattern Kawaii Cuddler®, & Penguin Crochet Pattern Kawaii Cuddler®.
This is a beginner level pattern. Our finished Snowman project is 11″ x 10″ tall using the recommended hook size. You are welcome to go up or down a hook size to create a different dimension. You can even hold two pieces of yarn together with a larger hook to create a giant cuddler. The sky is the limit!
If you have never worked one of our Kawaii Cuddler® patterns, they are geared towards beginners. You will work two flat pieces and single crochet them together to finish the piece. Even if you have never been able to crochet from a pattern before, we are confident you can create with a 3amgracedesigns pattern. We encourage you to join our Facebook Group where we remain active helping with questions! We love passing our love for the craft on to others!
We hope you enjoy making your very own Snowman! We cannot wait to see your creativity. When you complete one, please post it in our Facebook group or tag us on Instagram #3amgracedesigns. We love seeing your work!

Click HERE to purchase the Snowman Kawaii Cuddler® crochet pattern.
Have an amazing week! Happy Crocheting!

Don’t forget to PIN this project to your Pinterest Boards!

Click HERE to purchase the Snowman Kawaii Cuddler® crochet pattern.